Electrical connection Installation of distribution board with circuit breaker (single-phase domestic supply from utility pole and electricity meter to consumer unit)
What is a distribution board?
A switchboard is a safe system designed for a house or building that contains protective devices, disconnections, circuit breakers and fuses for the safe connection of cables and conductors to sub-circuits and terminal sub-circuits including their associated live (phase) neutral and earth conductors. A switchboard is also known as a “fuse board”, “panel board” or “consumer unit”. below are the types of switchboards.
Types of switchboards
- Main Distribution Board (MDB)
- Sub Distribution Board (SDB)
- Final Distribution Board (FDB)
MDB = Main Distribution Board
A switchboard unit installed in buildings that first receive input single-phase electrical power (low voltage (LV) AC (230 V AC or 120 V AC in the US)) from a secondary transformer through a utility pole and meter or distribution company’s electrical service provider outlets is known as main distribution board.
Main distribution board (MDB) is also known as fuse board or consumer unit, where the main protection and isolation devices are installed to provide electricity within a safe range to the connected electrical appliances.
Related wiring instructions:
- Different types of wiring systems and methods of electrical connection
- How to connect switches in parallel?
SDB = Sub Distribution Board
A switchboard that is used to distribute electrical wiring and circuits within a selected area in a building or house, i.e. a floor in a multi-story building. The sub-distribution board is connected and powered from the main distribution board through various conductors and cables sized according to the load requirement.
FDB = Final Distribution Board
The distribution board which provides the electrical supply to the terminal and sub-terminal circuits is known as the terminal distribution board. FDB (Final Distribution Board) directly connected through SDB (Sub Distribution Board) and limit switches are used to control connected electrical devices and appliances such as light, air conditioner, fan, etc.
Electrical installation accessories for a single-phase switchboard
The main distribution board or fuse boards (consumer unit) usually contain the following three main units for controlling and distributing electrical power to the various connected appliances and devices through cables and power line wires.
- DP = Double Pole MCB (Main Isolator or Main Switch).
- RCDs (also DP) for safety.
- SP = Single Pole MCB (Circuit Breakers and Fuses).
- MCB & CB = Miniature Circuit Breaker & Circuit Breaker.
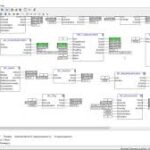
The electrical installation accessories and protective devices listed above are used to control and distribute electrical power (safely to connected electrical appliances) throughout your home. The following diagram shows a single-phase domestic electrical supply and the connection of a distribution board with an RCD.
How to connect an RCD (residual current device)?
In this single phase home supply wiring diagram, the main supply (single phase live (red wire) and neutral wire (black wire) from the secondary part of the transformer (3 phase wire system (star)) comes to the single phase electricity meter (Note that the single phase supply is in USA 230 V AC and 120 V AC. These two lines (Line and Neutral) from the meter are connected to the two-pole disconnect or MCB. Their live wire is connected to the RCD and then to the common bus bar Segment of the single-pole circuit breakers. The output lines from the MCBS (SP) are connected to end circuits and sub-end circuits and electrical devices like fan, lights, switches, etc.
The neutral is connected through the meter, MCB (DP), RCD and then to the neutral connection. All sub-circuits, sub-circuits can be connected to the neutral connection. Keep in mind that all electrical equipment and appliances should be connected to a grounding connection that is directly connected to the grounding electrode and grounding plate for proper grounding and grounding for safety reasons.
In the following single phase home power wiring, we have used 63A MCB (DP), 63A RCD (DP) and different MCB (SP) ratings like 20A, 16A, 10A etc. according to your need.
Double Pole MCB (DP = Isolator or Main Switch)
It is the main operating switch used to control the electrical supply in buildings. The main switch can be used to momentarily turn the main electrical supply ON or OFF to connected appliances in the event of an emergency such as a short circuit, electric shock, fire, or when working on the main board, sub-circuit or terminal sub-circuits for troubleshooting and maintenance purposes. A multiple or individual mains switchboard or fuse panel can be used if multiple power supply units are installed in the system, e.g.
RCD (DP) = Residual current protectors for safety
(RCD) Residual-Current Device or (RCCB) Residual-Current Circuit Breaker is an electrical wiring device or switch that disconnects or shuts down a circuit whenever it detects that the electrical current is unbalanced between the live (L) conductor and the return neutral (N ). And then immediately disconnect the flow of electricity in the connected circuits by automatically operating in emergency mode to avoid electric shock.
CB (SP) = Single pole circuit breakers
A Circuit Breaker is a device like a fuse that makes and breaks a circuit. In other words, a circuit breaker is a device that switches electrical power on and off under normal and abnormal conditions. These are automatic protective devices in the main switchboard or fuse box that will shut down the circuit if it detects a fault. The circuit breaker can be single-pole (SP), DP-two-pole (DP) and three-pole (TP). The size of the fuse and the circuit breaker are similar in use, but the use of the circuit breaker is safer compared to the fuses due to the automatic operation, because you can reset it again if it ever trips.
Complete guide to solar panel installation. Step-by-step procedure with calculation and diagrams
Complete solar panel installation design and calculations with solved examples – step by step procedure
Below is a complete DIY solar panel installation note, solar panel count calculation, battery rating / backup time, inverter/UPS rating, load and required wattage. with circuit, circuit diagrams and solved examples. Anyone who follows the simple steps below (DIY tutorial) can install and connect a solar p
Inverter / UPS rating:
Inverter / UPS rated power should be more than 25% of total load (for future load and taking losses into account)
800 x (25/100) = 200W
Our load + 25% extra input = 800 + 200 = 1000 watts
This is the rating of UPS (Inverter) i.e. We need 1000W UPS / Inverter to install solar panel according to our requirement (based on calculations)
Required number of batteries
Now required battery backup time in hours = 3 hours
Suppose we are going to install a 100Ah, 12V battery,
12V x 100Ah = 1200 Wh
Now for one battery (ie the backup time of one battery)
1200 Wh / 800 W = 1.5 hours
But our required backup time is 3 hours.
Therefore 3/1.5 = 2 → i.e. we will have to connect two (2) batteries, each 100Ah, 12V.
Battery backup clock
If the number of batteries is given and you want to know the backup time for those given batteries, use this formula to calculate battery backup hours.
1200 Wh x 2 batteries = 2400 Wh
2400 Wh / 800 W = 3 hours.
In the first scenario we will use a 12V inverter system, therefore we will need to connect two (2) batteries in parallel (12V, 100 Ah each). But the question below:
Series or parallel connection for batteries
Why batteries in parallel, not in series?
Since this is a 12V inverter system, so if we connect these batteries in series instead of parallel, then the rated power of the batteries becomes V1 + V2 = 12V + 12V = 24V, while the rated current would be the same, ie 100Ah.
That’s why we connect the batteries in parallel, because the voltage of the batteries (12 V) will remain the same, while their Ah (Ampere Hour) will increase. ie the system would become = 12V and 100Ah + 100Ah = 200Ah.
Now we connect 2 batteries in parallel (each 100Ah, 12V)
i.e. 2 12V, 100Ah batteries will be connected in parallel
= 12V, 100Ah + 100Ah = 12V, 200Ah (parallel)
- Related Post: Series, Parallel and Series-Parallel Connection of Batteries
Charging current for batteries
Now the required charging current for these two batteries.
(Charging current should be 1/10 Ah battery)
200Ah x (1/10) = 20A
- Related post: Charging time and charging current formula for batteries (with 120Ah battery example)
Battery charging time
Here is the formula for the charging time of a lead acid battery.
Battery charging time = Battery Ah / Charging current
T = Ah/A
For example, for one 12V, 100Ah battery, the charging time would be:
T = Ah / A = 100 Ah / 10 A = 10 hours (ideal case)
due to some losses (it was found that 40% of the losses occurred during battery charging), this way we take a charging current of 10-12A instead of 10A, this way the charging time required for a 12V, 100Ah battery would be:
100 Ah x (40/100) = 40 (100 Ah x 40% losses)
nominal battery capacity would be 100 Ah + 40 Ah = 140 Ah (100 Ah + losses)
Now the required charging current for the battery would be:
140Ah / 12A = 11.6 hours.
Charging controller rating
As we calculated above that the charging current for a 200Ah battery is 20-22 Amps (22A for battery charging + 10A for direct DC load), therefore we can use a charge controller of about 30-32 Amps.
Note: The above calculation is based on an ideal case, so it is recommended to always choose a solar panel slightly larger than we need, because there are some losses when charging the battery through the solar panel, just as the sunshine is not always an ideal mood.
How many watts do we need a solar panel?
In the previous post, we showed a very simple method to find out how many watts of solar panel we need for our home electrical appliances? it depends on the amount of sunshine and the load in watts that we need to power the electrical appliance.
Which solar panel do we choose?
Among the many brands and materials of solar panels, such as c-Si, String Ribbon, Thin Film Solar Cells (TFSC) or (TFPV), Amorphous Silicon (a-Si or a-Si:H), Cadmium Telluride Solar Cells ( CdTe) , Copper Indium Gallium Selenide (CIGS/ CIS) Solar Cells, BIPV: Building Integrated Photovoltaic Panels, Hybrid Solar Cells and PV Panels, we have discussed in great detail in the post “different types of solar panels with advantages/advantages, costs and applications” Hereby How will you be able to find out which type of solar panel is best for home use?
Related posts:
• How to calculate the correct size of a solar charge controller?
• PWM solar charge controller – operation, sizing and selection
• MPPT solar charge controller – operation, sizing and selection
• Home wiring diagrams and instructions
• UPS / inverter wiring and connection diagrams
• Solar panel wiring and installation diagrams
• Wiring and battery wiring diagrams
• Single-phase and three-phase connection diagrams (1-phase and 3-phase connection)
• Three-phase motor power supply and control wiring diagrams
Automatic street lighting control circuit using LDR and BC 547 transistor
Electro technics
105 3 minutes of reading
Basic electronic project – circuit for automatic control of street lighting
The following is another simple Electrical/Electronics project for automatic street light control systems, especially for students, novices and hobbyists.
Function:
- It is an LDR and Transistor (BC-547 NPN) based dark detector circuit that automatically switches the street lighting system on and off.
- Automatically turns on street lights when sunlight falls below the visible range of our eyes. (e.g. in the evening after sunset).
- Automatically turns lights OFF when sunlight hits it (ie LDR) eg in the morning a sensor called LDR (Light Dependent Resistor) senses light just like our eyes and deactivates the circuit.
- Related Simple Projects:
- Simple DC Motor (Electrical Project)
- The simplest DC motor ever.
advantages:
- Automatic operation of street lighting control systems helps reduce energy consumption compared to manual street lighting control. This is because there is a delay in earlier switching operations both in the morning (at sunrise) and in the evening (at sunset).
- On sunny and rainy days, the ON and OFF times are noticeably different, which is one of the main disadvantages of using timing circuits or manual control to switch the street lighting system.
- Enough… Now let’s get into the step by step guide to creating a basic project circuit.
- Related Post: Automatic Irrigation and Plant Watering System – Circuit, Code and Project Report
Required Components:
- LDR – Light Dependent Resistor
- 2 numbers of transistors. (NPN Transistor – BC547 or BC147 or BC548)
- Resistor – 1kΩ, 100kΩ, 330 Ohm & 470 Ohm.
- Light emitting diode (LED) – any color
- Connecting wires – (Use 0.6 mm (standard size) single core plastic coated wire or any wire used in computer networks).
- Power supply – 6V or 9V
Method
- Place the first Q1-BC547 (NPN) transistor on the breadboard (or general circuit board) as shown in Wiring Diagram 1.
- Connect another Q2-BC547 (NPN) transistor to the breadboard as in step 1.
- Connect the wires across the emitter pin of both transistors and the -V terminal of the battery (bottom/bottom row of breadboard).
- Connect a wire across the collector pin of transistor Q1 and the base pin of transistor Q2.
- Connect a 1K resistor to the positive terminal of the battery (top row of the breadboard) and the collector pin of transistor Q1.
- Connect a Light Dependent Resistor (LDR) to the positive terminal of the battery (top row of the breadboard) and the base terminal of transistor Q1.
- Insert a 330 Ohm resistor across the base pin of transistor Q1 and the negative terminal of the battery (bottom bottom row of the breadboard).
- Connect a 330R resistor to the positive terminal of the battery (top row of the board) and the anode terminal of the LED (light emitting diode) & Connect the cathode terminal of the LED to the collector pin of transistor Q2.
The simple circuit is now ready for testing. Connect the 6V to 9V battery terminals to the circuit as shown in the figure and see the output. When you block the light hitting the light dependent resistor (LDR), the LED lights up and vice versa.
LED LIGHTS EVEN IN LESS DARKNESS. If the LED lights up in less darkness, use a flashlight or lighter. In addition, you can try to adjust the sensitivity of this circuit using a variable resistor instead of R1-300 Ohm. You can also use other resistors (eg 1KΩ, 10KΩ and 100KΩ etc.)
Engine
An electric motor is a device that converts electrical energy into mechanical energy. The energy conversion process is exactly the opposite of a DC generator. In a generator, the input mechanical power is supplied by the prime mover, while in a DC motor, the input electrical power is supplied by a DC source. The construction of a DC machine is the same whether it is a motor or a generator.
DC motor
A machine that converts direct current energy into mechanical energy is called a direct current motor.
The principle of operation of a direct current motor
The operation of a DC motor is based on the principle that when a current-carrying conductor is placed in a magnetic field, a mechanical force acts on the conductor. The magnitude and direction of this generated force is given by Fleming’s left hand rule as follows:
F = BIl
Where,
- F is the generated mechanical force
- B is the maximum Tesla flux density (wb/m2)
- I flows Electric current in amperes in conductors.
- l is the length of the conductor in meters
as basic enough, now we will start our simplest DC motor project based on battery cell.
Requirements:
- 1.5 to 12V battery cell or adapter (120V – 220V AC to 12V-9V DC)
- 1 speaker ring magnet
- Thin enamel insulated wire
- 2 numbers of eye hooks or safety pins (same size)
- Method:
- First fasten eyelets or safety pins to a wooden or plastic block.
- Place the ring magnet in the middle of the box (between the two hooks).
- Fasten the enameled insulated wire tightly around the cylindrical tube
- Strip the insulation from both ends of the insulated wire that fixes and makes contact with the hooks.
- Take the coil (in other words the Armature) and hang it using eye hooks above the magnets as shown in fig.
- Connect the eye hooks to the battery and push the armature to rotate. The motor armature will start running at normal speed.
- Hold one more magnet on top of the coil or above the first magnet. Try changing the pole of the magnet, the rotation speed of the motor will be high (it will heat up the coil).
Related fun simple electrical projects for beginners:
- Simple DC Motor (Electrical Project)
- Generator from the engine. Very simple
- Very simple generator / alternator (dynamic model from the bin)
- Build a simple generator to understand the working principle of a generator/alternator. (coil generator)
- Generator from engine (with simple CD turbine) . ( CD Disc Generator) from the Recycle Bin
- Simple electrical project (magnet levitation)
- A simple project of a hydroelectric power station with a turbine. (modal)
- Mini Air-Cooler System with 12V fan (homemade form of trash can)
- Automatic street lighting control system. (Sensor using LDR and BC 547 transistor.) Very simple.
- List of ideas for final year electronics projects
- Electronic engineering project ideas for engineering students
- Simple and basic electronics mini project ideas for beginners
- List of the best electrical mini projects
- Final year projects in electrical engineering
- Best electrical project ideas for E